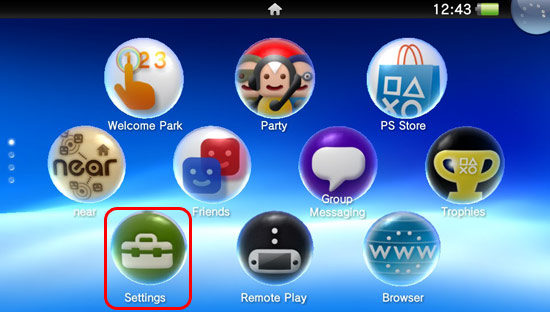
From your home screen, choose Settings and press Start when prompted.
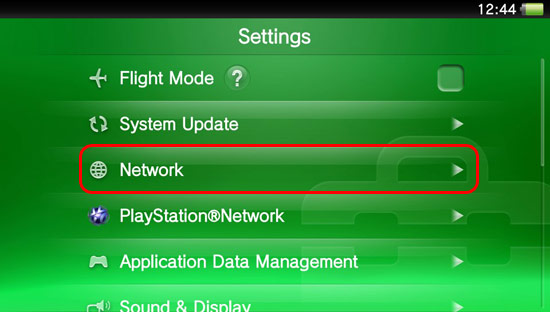
From the Settings menu, select Network.
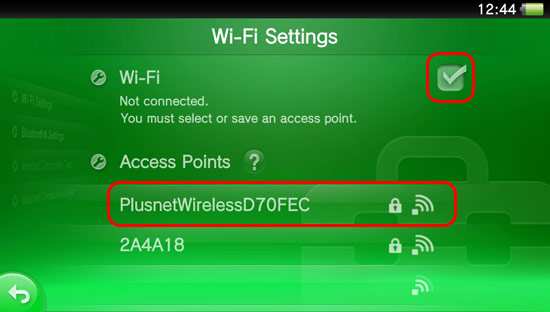
From the Network Menu choose Wi-Fi Settings.
If you haven't done so already, make sure Wi-Fi is switched on by ticking the box at the top of the screen. From the list below, select your router's wireless network name (SSID). If you're using one of our routers, it will start withPlusnetWireless.
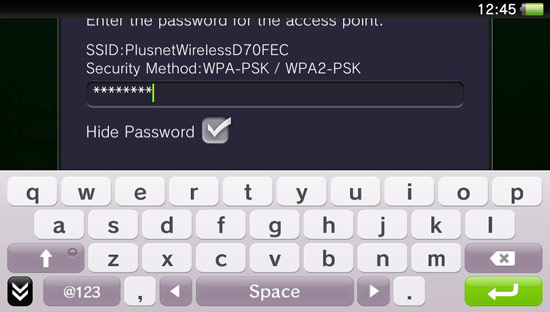
Enter your wireless network password. When you've finished, press the green return key, followed by OK.
After a few moments your PS Vita will connect and return to the Wi-Fi Settings screen. That's all you need to do, your PS Vita is now connected. Connection is indicated by the wireless icon at the top left of the screen.