Turn on suggestions
Auto-suggest helps you quickly narrow down your search results by suggesting possible matches as you type.
Showing results for
Upload to your webspace with Filezilla
Upload to your webspace with Filezilla
Topic Options
- Subscribe to RSS Feed
- Mark as New
- Mark as Read
- Bookmark
- Subscribe
- Printer Friendly Page
- Report to Moderator
- Plusnet Community
- :
- Library
- :
- Upload to your webspace with Filezilla
Upload to your webspace with Filezilla
27-04-2010
8:31 PM
FileZilla is a free FTP client that's available for Windows, Mac OS X and Linux based systems. You can download it here.
These instructions will show you how to connect to your Plusnet webspace but they also apply to any other ftp site/webspace you have connection details for.
There are two ways to get FileZilla to connect:
Use the Site Manager for connections that you use frequently. Quick Connect is better if you're connecting to a site as a one off.
1. Connecting with Site Manager
Once you've downloaded and installed Filezilla, open it and click on the first icon you see on the far left of the icon bar (highlighted in the image below)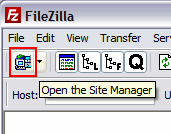
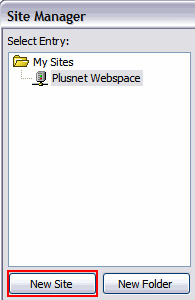
This will open the Site Manager. Click New Site and you'll see a line added under the My Sites folder. Type the name of the site you'll be connecting to and press Enter on your keyboard. For this tutorial we'll call it Plusnet Webspace but you can call it what you like.
Over on the right, enter the details for your connection. Below is what you'll need to put to connect to your Plusnet webspace:
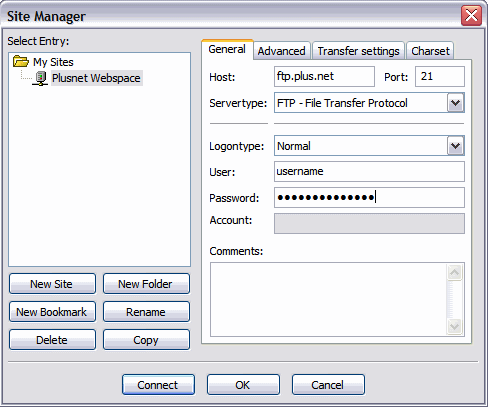
- Hostname: the FTP address of the site you're connecting to.
- Port: 21 (this is the default FTP port, nearly all sites you connect to will use this port
- Servertype: FTP - File Transfer Protocol
- Logontype: Normal
- User: Your Plusnet username
- Password: Your Plusnet password
If you're not sure what to use for any of the above, you can find the details you need here.
Press OK when you're done.
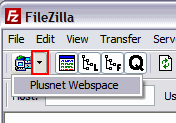
Once you've entered details into the Site Manager, you can connect to the site by clicking the arrow next to the Site Manager Icon and then clicking on the name of the site you want to connect to. (There'll be a list here if you have more than one site configured)
[Top]
2. Quick Connect
Quick Connect is easy, but you'll need to fill in the details each time you open Filezilla, so for a site that you connect to frequently it's better to use the Site Manager.Open FileZilla and enter the details for your connection in the Host, Username, Password and Port boxes. Again, in this example we'll use the details needed for Plusnet Webspace. There's confirmation of the details you'll need

When you're done, click Quick Connect.
[Top]
3. Transferring files once you're connected
Once you're connected you should see something similar to this: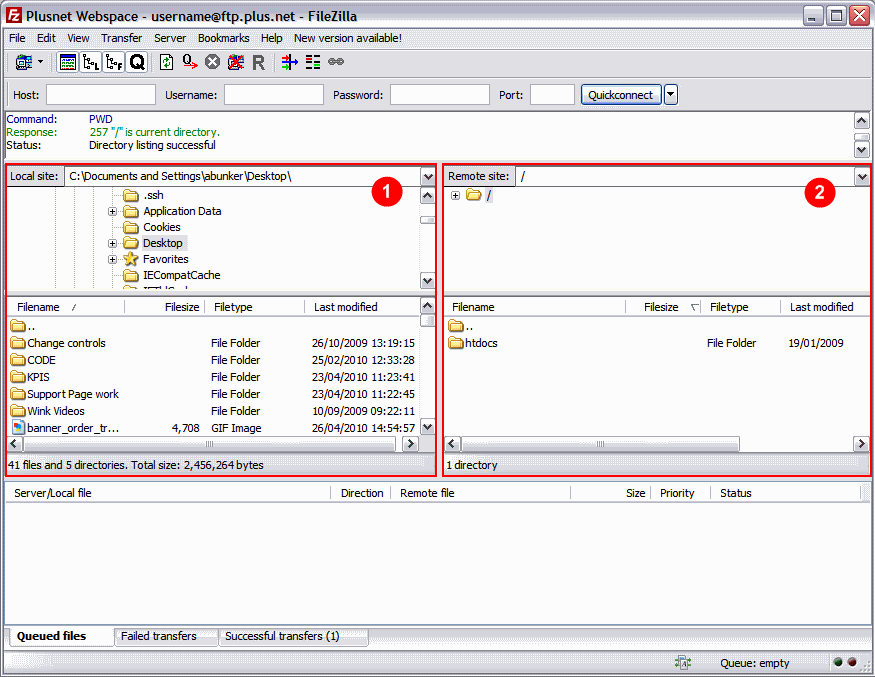
The left side (1) shows files on your computer, use the top half to find the files you want to upload. The right side (2) shows your webspace.
To transfer files over, simply drag them from the left side (1) over to the right side (2). Remember that you'll need to go into the HTDOCS folder first if you're connecting to your Plusnet webspace.
[Top]
